Pages

The Foodie Blogroll

Showing posts with label Holiday. Show all posts

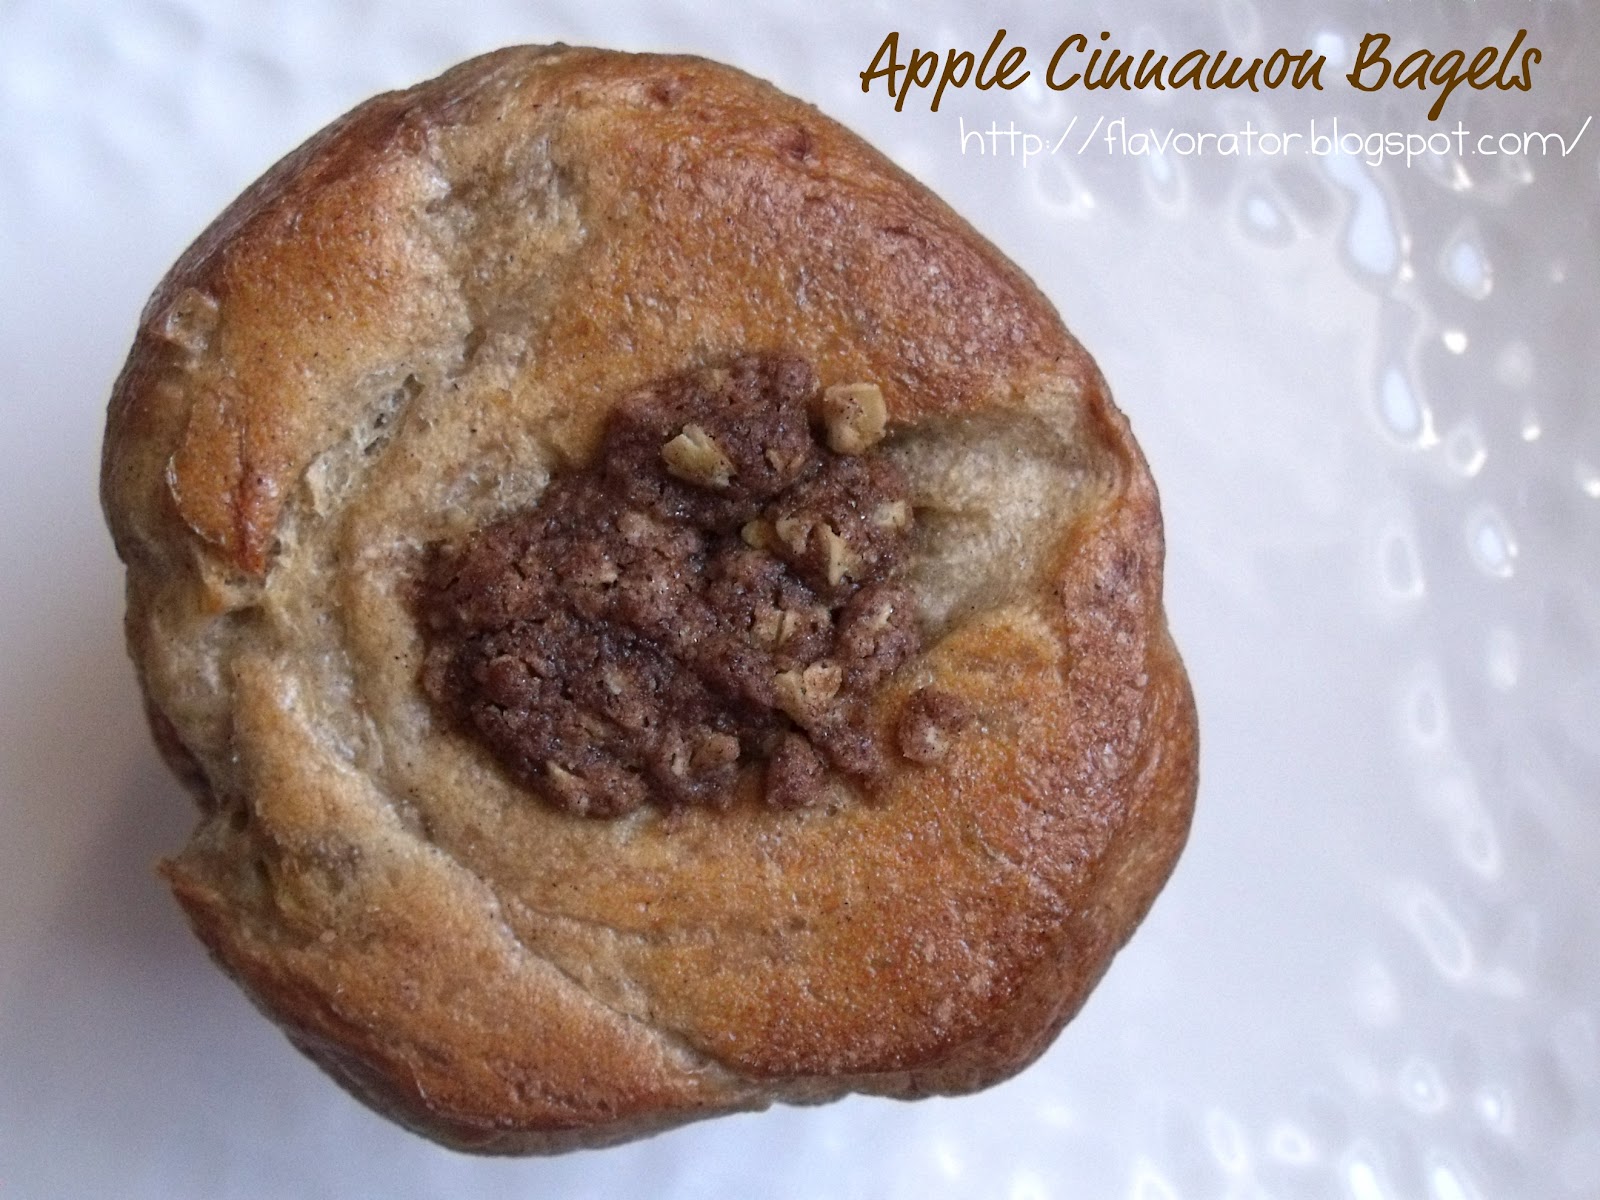
Apple Cinnamon Bagels


Since I’ve started developing my skills in the kitchen, one of the things that I enjoy cooking up the most are bagels.  Just like many of the things that I enjoy creating most – bowls of oats and shakes, bagels are also incredibly versatile.  You can have savoury, sweet, hearty, grainy, and many more varieties.  I recently stumbled upon a blog that I have very much been enjoying reading ­­­­­­my little celebration.

When I first started baking and would browse bagel recipes to try and replicate, a lot of them were incredibly intimidating as well as overall just time consuming.  When I bake, I don’t want to spend five million hours waiting for something to sit and rise (even though I did once make a bread that took eighteen hours to set), I would much rather make my product, let it sit for an hour, then bake for another 45 minutes or so, and have them in a nick of time.

These bagels were in my league, there was no sponge to be prepared, and even though I had to do a little bit of work with making the “apple pie” filling these were a cinch to throw together.  Seeing this recipe, I would have been a fool not to attempt them.  When I first looked at them, I thought to myself that they looked far too glutinous to make, because I knew I would end up eating the whole batch to myself but when it comes down to it, I work out, and I work out hard, I deserve to treat myself once in a while, and so I did.
When I first got into the kitchen and got all the ingredients for the first part of the recipe – the apple filling, I couldn’t wait, I knew the smell awaiting me was going to be one of my all time favourites.  Well, I was certainly right.  It had been a long time since I created something as sinful as this – I usually omit butter and replace it with either avocado oil, applesauce or a mashed banana, but this recipe, I was very reluctant in doing so and wanted to go all out, so I did just that.

The results of this bagel?  I can’t even begin to tell you.  Well, I guess I can begin, because I’m going to, but, they leave me almost speechless.  As I’ve mentioned on numerous accounts I am not a fan of pie, not at all, but give me the filling that accompanies it and it’s almost certain to be a hit – I mean how could it not when I’m a fruit fiend?  Apple pie is one pie I wish I enjoyed, I looooove the filling, but I just cannot get over the flaky crust that accompanies pies – gross.  So when I find a recipe for an almost-like apple pie in bagel form your darn right I’m going to attempt the recipe.

These were incredibly great, especially if you’re not a pie advocate but thoroughly enjoy the flavours that come with it.  These bagels made the house smell like a fresh October day.  I knew by the first few aromas that my nose got a hint of that these would certainly be a hit.  I made a smaller batch since I didn’t want to have too many to eat myself, but I quickly shot myself in the foot for that, since you can always freeze bagels, I wish I had, but it’s probably a better thing that I didn't. 

If you have never made bagels before and want to try some out for the first time, I would certainly suggest making these.  The process is super easy, the result is fantastic, and they look incredibly beautiful.  They are sweet, but overly sweet, there are gorgeous hints of cinnamon and brown sugar with speckles of apple in almost every bite.  It was very much a replica of apple pie via bagel, yum!

Ingredients:
  • 2 cups warm water, about 110 degrees F
  • 2 (1/4-ounce) packets active dry yeast
  • 3 tbsp granulated sugar, plus 1 tbsp
  • 4 to 5 cups all-purpose flour
  • 1 cup whole wheat flour
  • 1 tsp salt
  • 1 tbsp Earth Balance or butter
  • 3 small-medium granny smith apples, cored, peeled and diced
  • 2 tsp cinnamon
  • 1/4 cup + 3 tbsp sugar

Streusel Topping - 
  • 1 tbsp butter
  • 3 tbsp sugar
  • 2 tbsp brown sugar
  • 2-3 tbsp flour
  • 2 tbsp rolled oats
  • 1 tsp cinnamon
Directions:
Add 1 tbsp of butter to a large skillet over medium heat, and then add the apples,  2 tsp. cinnamon, 2 tbsp sugar and stir. Cover and let cook for 10 minutes, stirring occasionally until the apples are soft and carmelized. Add more sugar and cinnamon if needed. Set aside to cool.

Combine the water, yeast, and 3 tablespoons of the sugar in a large bowl. Stir and let stand until foamy, about 5 minutes. Add 1 cup of whole wheat flour, the apple mixture, salt and 1/4 cup sugar and stir. Then gradually add 3 cups of AP flour and mix until the mixture comes together.
Add 1 to 1 1/2 cups additional AP flour 1/2 cup at a time, either stirring with the wooden spoon or working with your hands. Turn out onto a lightly floured surface and knead until smooth and no longer sticky adding flour as needed, about 10 minutes.
Grease a large bowl and place the dough in the bowl, turning to coat. Cover and let rise in a warm, draft-free spot until almost doubled, about 1 hour.
Remove from the bowl and punch down the dough. Divide into 12 equal pieces, about 2 to 3 ounces each. Loosely form each piece of dough into a ball and then poke a small hole in the middle of the ball with your middle and ring fingers from the underside. Repeat with the remaining dough. Place on a lightly greased surface [like a baking sheet or counter], cover with a clean cloth, and let rest until risen but not doubled in a draft-free spot, 20 to 30 minutes.
Preheat the oven to 400 degrees F and grease a baking sheet. Prepare streusel topping by mixing all ingredients together in a small bowl with fingers or a fork. If the mixture is too wet, add more flour. If it’s too dry, add more butter.
In a large, heavy pot, bring 12 cups of water and the remaining 1 tablespoon of sugar to a boil. In batches, add the bagels to the water and boil, turning, for 30 seconds to 1 minute. Flip bagels onto the prepared sheet pan. Bake for 5 minutes, turn over [optional] and cook for another 30 to 35 minutes. [If adding struesel topping, spoon topping onto bagels after you've flipped them at the 5-minute mark. Otherwise, add it at the beginning.]
Remove from the oven and let cool on a wire rack.
Have you ever made any dessert-like bagels such as this?


Green cookies?

I am currently sitting in my living room, procrastinating on packing the last of my things for beautiful British Columbia.  Heeeyy, don't look at me like that!  I'm 95% done, I just have to pack the last of the things for my carry-on, do a quick tidy and then wait for my dad to pick me up so we can head to the airport.  I figured I might as well kill a few minutes by writing a quick entry for ya'll (oh yeah I did) before I head out right?

This week I surely won't be cooking anything fancy.  We are staying at a chalet, and will have a full kitchen, but my priority this week isn't to be in the kitchen, absolutely not, no I want to take full advantage of the snow, the slopes and the beautiful scenery that this province has to offer.  I will however still be posting if I have time, as I always have recipes that I can share (I really do get backed up when it comes to posting, but I mean, how could you not with all the delicious meals you eat in one day?  They add up!)

Today, I'm going to post you my third and last post for St-Patrick's Day.  Again, to my delight these turned out brilliantly, as I was a little afraid at first they wouldn't or that they'd alter the taste but thankfully they did not, and they still kept their beautiful bright green colour, woohoo!

Over the Christmas break I made one of the darn right most amazing cookies I had ever had in my life.  When it comes to alcohol I'm a pansy, and I looooove anything that is creamy and or insanely high in sugar, anyone seen those Caramilk Cream Coolers?  Now that's what I'm talking about!  My absolute favourite, hands down, hey, it even get's the guys excited when they seem them!  Anywho, with all that being said, Baileys is one of my absolute favourites, plus, it's alcohol that people don't give you shifty eyes when you drink some no matter how early or how late it is in the day, that is always a bonus right? When incorporating Baileys and cookies together, well hot dang, you have yourself probably the most sinful cookie ever.  Yes, I've seen some crazy cookie concoctions, but to me, this is crazy, and is definitely my favourite without a doubt.

I didn't take any pictures of these cookies when I initially made them because well... they went waaayyyy too quickly.  This time however, because I also spruced up the recipe I needed to make sure to snag some pictures before they go (because well, they're already going quickly!)  I decided to split the batch in half and make two kinds.  Between the two I'm not sure which one I liked more, because both of them have some of my favourite ingredients.

In the first batch, the one that I got the idea to spruce up while I was trying to go to sleep (such an awful idea to get a cookie idea, because I seriously contemplated making these cookies, and it was two in the morning, and it was clearly distracting me from actually getting to bed...) nonetheless, I waited until the next day to make them.  I decided that, I would like to add in some natural green colour to these cookies, especially because I really am not a huge fan of using artificial colouring.  So, that is what I did, and thankfully just like my Tropical Green Pancakes the colours didn't fade and the spinach wasn't known to the tastebuds either, absolutely love it.

Next, I decided to not use Mint Chocolate Baileys, but instead use the original version and chop up my all time favourite chocolate bar EVER Cookies n' Cream (hey, it's white chocolate, I'm a huuuuuge sucker!)  These came out soooooooo well!  My boyfriend eats one, "you are something else, you know that?" - yeah, that's what I like to hear!

What I love about these cookies is that, they are puffy, with crispy outsides yet ooey-gooey soft centres, the dark brown sugar gives them a darkness and you get certain salty bites that's just delightful.  Regardless of which cookie between the two, you are sure to have your socks knocked right off, they are downright sinful and seriously need to be labelled so, because these could certainly kill a diet that's for sure!


Mint Chocolate Chip Baileys Cookies

Recipe inspired from here

Ingredients:
  • 1/8 cup plus 1 tbsp canola oil
  • 1/2 cup dark brown sugar
  • 1/2 tbsp ground flaxseed + 1 1/2 tbsp water
  • 1/8 cup Mint Chocolate Baileys
  • 1/2 tsp vanilla extract
  • 3/4 cup whole wheat flour
  • 1/4 tsp baking soda
  • 1/8 tsp baking powder
  • 1/4 tsp fleur de sel (or other salt)
  • 1/2 cup dark chocolate chips 
  • 1 1/2 cups fresh baby spinach
Directions:

Preheat oven to 350 degrees F.  Line a cookie sheet with parchment paper.

In a small bowl mix together your flaxseed and water.  Allow to sit for five or so minutes until it has turned into an almost like gel state - set aside.

In the bowl of your food processor add your spinach and Baileys until spinach chunks disappear.

With your paddle attachment on high, mix together the brown sugar and oil until well incorporated.  Add flaxegg, Baileys, and vanilla extract.  Mix well.  In another bowl, sift together the flour, baking soda, baking powder, and salt.  Add to the wet ingredients and stir until everything is moistened.  Fold in the chocolate chips.

Scoop tablespoon-sized dollops onto your cookie sheet, spacing about two inches apart.

Bake for 10 - 12 minutes, until golden.  Repeat with the rest of the dough.

Cookies n' Cream Baileys Cookies

Recipe inspired from here

Ingredients:
  • 1/8 cup plus 1 tbsp canola oil
  • 1/2 cup dark brown sugar
  • 1/2 tbsp ground flaxseed + 1 1/2 tbsp water
  • 1/8 cup original Baileys
  • 1/2 tsp vanilla extract
  • 3/4 cup whole wheat flour
  • 1/4 tsp baking soda
  • 1/8 tsp baking powder
  • 1/4 tsp fleur de sel (or other salt)
  • 1 1/2 Cookies n' Cream bars ~ 1/2 cup
Directions:

Same directions as above, only there is no processing of spinach, and change the Baileys from Mint Chocolate to original and use Cookies n' Cream chocolate instead of dark chocolate!

Peanut Butter Cookies

Recipe taken from here

The last cookie that I have for you guys is one of my recent favourites.  I am not one to make the same recipes over and over again - however, both the Baileys cookies and these are an exception.  I have never been the biggest fan of peanut butter cookies to be honest, but it is my mom's favourite cookie.  A few months ago, as I was doing my thing, and looking through recipes I stumbled across a peanut butter recipe that actually sounded very good.  I figured that if I didn't like them, then at least my mom would eat them.  However, this is also when my peanut butter craze started, actually these could possible be the thing to blame as to why my peanut butter obsession has lasted so long.

These cookies are soft, with the perfect amount of peanut butter, if you add salt on top of the cookie before it bakes, it takes it's already perfect self to a whole new level.  The first time I made these, I sandwiched two cookies together with some raspberry jam before baking them, and it tasted like a sinful peanut butter and jam sandwich.  I love these cookies, and they are so incredibly versatile.  This recipe is definitely my go-to peanut butter cookie for now on.  The maple syrup also creates the perfect sweetness that to me, is what separates these peanut butter cookies from the rest.  Go on, and give them a try.

Ingredients:
  • 2 cups whole wheat flour
  • 1 tsp baking soda
  • 3/4 tsp fleur de sel (or other salt)
  • 1 cup natural creamy peanut butter
  • 3/4 cup pure maple syrup
  • 1 1/2 tsp vanilla extract
  • 1/4 cup soy milk (or other non-dairy milk)
  • 3-4 tbsp canola oil (or extra virgin olive oil)
  • Raw sugar & sea salt for sprinkling
Directions:

Preheat oven to 350F degrees and line a baking sheet with parchment paper or a non-stick mat.
Stir the peanut butter, maple syrup, optional olive oil, and vanilla until combined in a large mixing bowl. Sift the flour, baking soda, and salt over the top and stir until just combined. If the dough is hard to work with, chill in the fridge or freezer for 15-30 minutes or until easy to shape.
Shape into balls (I like to use a teaspoon) and gently flatten with a fork. If the dough sticks, sometimes moistening your fingers or the fork helps. Sprinkle the tops with salt and raw sugar. 
Bake for 11 minutes until set.

Happy St-Patrick's Day!
How are you celebrating?

St-Patrick's Day Inspiration.

I am not one that usually celebrates St-Patrick's Day; I am not Irish, nor am I a big drinker.  Even when I was in University, St-Patties wasn't really a day I looked forward to unlike most of the people whom I was surrounded with.  To me, it's just another day, especially because it isn't a day for my heritage.  If I want to drink with my friends, I will drink, I don't need a day that means nothing to me to have an excuse to drink. Now I know that sounds cynical, but it's just not my thing, I do however really enjoy dressing in green and seeing what people come up with for kooky costume ideas - that to me is very fun.  This year I won't even be in Ontario for St-Patrick's so, I won't even have the option of drinking with my friends, even if this year I wanted to.

For Christmas, I was surprised with a flight ticket for British Columbia.  My dad, brother and I, along with my dad's girlfriend, and two of her kids will be spending seven days at Big White Ski Resort, which I am very much looking forward to.  It hadn't really sunk in that I was going skiing for a week until last night.  With that being said, the weather in Ontario this past week has been nothing short of beautiful.  Every single day it's been at least fourteen degrees Celsius, and as much as I am looking forward to this trip, going from the beautiful warm weather, to a cold snowy environment is sending chills down my spine.  I know however when I go there, and I see the beautiful mountains, and the abundance of white (in which we lacked here in my part of the province), that I will forget all about the cold and will not be able to contain myself.

Shamrock Shake Version 2.0


Now, as I said, I am not one to celebrate St-Patty's, however, I really love the colour green, and well, one of my latest favourite ingredients to incorporate into my meals is spinach, which is a beautiful, vibrant green as we all know.  This time last year, I had come up with a delicious and healthy Shamrock Smoothie, despite the fact that there wasn't anything bad for me in it, I wanted to make a new and improved version.  At this time last year, despite the fact that I was "working out" (for me to look back on last year in comparison to now, I don't believe what I was doing was really working out.  Not only that, I was incredibly ignorant to protein all together so it really wasn't a focus of mine).  This year however, especially now that I know how to lift weights properly, and how to get my heart working like a mad man without your "stereotypical" cardio i.e. running or biking, I now focus a lot of my attention on how to get protein into my diet.

Shamrock Shake Version 2.0 - is still just as delicious, if I'm to be quite honest, it taste practically the same, except it is substantially higher in protein versus the one I made last year, seeing as last years didn't have any, other than what is in the soy milk, oi.  So here we have it, if I had to choose between the two, clearly version two is much better suited for the needs of my diet!

Ingredients:

  • 2 cups fresh spinach
  • 1 large frozen banana
  • 1/4 tsp peppermint extract
  • 1/4 tsp vanilla extract
  • 1/3 cup 0% vanilla Greek yoghurt
  • 1 tsp cacao powder
  • 1 scoop vanilla protein powder
  • Cacao nibs - to garnish
Tropical Green Pancakes


Next on my St-Patrick's Day list of goodies, is something that I am a huuuuuge fan of and wanted to healthify even more (yes, I know that's not a word).  At first I was a little skeptical as to how these would turn out, but nevertheless to my surprise they turned out amazingly.  When I woke up this morning, I really wasn't in the mood to have a protein shake, instead I was really craving some pancakes, probably because I'm beginning to get in vacation mode, and pancakes are always a nice comfort food and reminds me of vacation.  However, I'm not on vacation, and even when I do go to British Columbia I will still be maintaining a healthy diet via exercise and food consumption of course.  Despite the fact that I wanted pancakes, I wanted to add a bit more nutrition to them as well, so I decided that I would try making some green pancakes - because I wanted to be healthy of course, but as well so I did have a delicious entry to post.

I have seen various green pancakes on the web, but none of them have ever really drawn a lot of attention to my tastebuds, so I figured why not get in the kitchen.  These pancakes took a little longer to make than usual (first because I'd never made them before, so wasn't quite sure what to do), as well as because I had to use the blender and take out some few extra bowls.  I was in the kitchen for quite a while, but it was seriously worth it.  It was worth it for the flavour of course, tropical, what else could I ask for, but the beautiful green!  At first I wasn't so sure that the green would still be as prominent after cooked, but I'm assuming because it was natural versus an artificial colour i.e. food colouring this is some of the reason behind it, I'm not a scientist, but this makes sense to me haha.  

From now on, I'm going to try and use spinach in a lot more of my foods.  When blended in you seriously don't even know that there is spinach other than the colour.  I love this, and it is such a sneaky way of adding in a lot of greens to your diet.  The thing that's awesome about spinach too is that when it is combined with fruits the iron absorption is greater, win-win-win situation!


Ingredients:
  • 1/2 cup soy milk
  • 1/2 very ripe banana
  • 1 1/2 cups fresh baby spinach
  • 1/2 cup whole wheat flour
  • 1/2 tsp baking powder
  • 1/4 tsp baking soda
  • 1/8 tsp salt
  • 1/2 tbsp flaxseed + 1 1/2 tbsp water
  • 1/2 cup freshly chopped pineapple
  • 1 tbsp flaked coconut
Garnish:
  • 1/2 banana
  • Carob chips
  • 0% fat Greek yoghurt (flavour of choice)
  • Coconut flakes
  • 1 1/2 tsp maple syrup
Directions:

In a teeny tiny bowl, mix your flaxseed and water.  Allow to sit for a few minutes until it becomes almost gelly like (about five minutes).

In a small bowl combine your flour, baking powder, baking soda, salt and coconut flakes.  Leave this to the side.

In a blender, add your milk, banana, pineapple, and spinach until there are no visible chunks of spinach.  Add in your flaxegg.  Pour your green mixture in with the dry ingredients and mix until combined.

Preheat a griddle on medium low. Using a 1/4 measuring cup, drop batter onto the griddle. Cook until the tops are bubbly and edges are dry. Flip and cook another minute.

Mash the remaining banana and maple syrup together.  Top your pancakes with your banana mixture, yoghurt, coconut flakes and carob chips.  

Devour.


How do you try to sneak greens into your diet?
Have you ever tried sneaking spinach into anything other than smoothies/shakes?

Better late than never right?

Around Christmas is when I had stopped blogging for quite some time.  It's not that I didn't enjoy doing it, it's just I wasn't finding inspiration in the things I was doing.  It was nice not having to think before I was going to eat, or when I made desserts to remember to take pictures beforehand.  I guess when it comes down to it, it was pure laziness.  I was still on the computer, looking at fellow bloggers pages, but I just couldn't bring myself to doing so, instead I was enjoying spending time with friends, being with my family, working out and reading.  I realized though it really was something I missed (hence I'm writing this now).  Despite my lack of inspiration there were still a few goodies I did snap some pictures of.  Unfortunately I didn't photograph all my Christmas baking which is rather unfortunate since I made some really amazing sweets this year.
This Christmas had to be the first Christmas that I didn't go overboard.  I made about eight or nine goodies, which really is not that much, and when I was making them, I wasn't doing full batches.  Thankfully for me, this was good; it gave me enough to pack up for friends as gifts, and it left me with a few for me to snack on.  The recipes I'm going to post were the top favourites of the season (decided on by both me and the people who had tried my baking) - I did however forget to photograph a bark that was the top favourite.  Nevertheless, that's not a big deal as I will surely be making a batch for Easter because it got gobbled down the first two days, it was such a hit!


Peanut Butter Pretzel Bites

Recipe taken from here

The first recipe I'm going to post is for something that I had been seeing all over the web.  Back then, just like now, I was really going through a peanut butter kick.  Three quarters of the recipes I made during the holiday season involved peanut butter.  This may not be the traditional holiday flavour, as I usually associate Christmas with shortbread, and peppermint, but not this year, not in my house!  If you are one the fellow pin-a-holics you surely will of seen these cookies - Peanut Butter Pretzel Bites.  If not, basically think of Reece's Peanut Butter Cups sandwiched between two pretzels, dipped in chocolate, and garnished with sprinkles, ahhhh yuuuum!  These were fantastic, especially as they were pretty much bite-sized desserts, so it would allow you to sample more than just one dessert without feeling that "ooooh gosh, I've been such a glutton this Christmas".  Will surely be making these next Christmas, as they were loved by all!
Ingredients:
  • 1 cup creamy peanut butter
  • 2 tbsp softened butter
  • 1/2 cup powdered sugar
  • 3/4 cup brown sugar 
Pretzels - 
  • 1 bag  semi-sweet chocolate chips
Directions
Combine peanut butter and softened butter in a large bowl with a fork or whisk, or in a stand mixer.  Add the sugars and mix to combine.  At this point if the filling will roll easily into balls without sticking to your hands you’re ready to go.  If not, add a little more of each sugar until you reach a consistency that is easy to roll (I used about 3/4 cup of each sugar).
Use a teaspoon measure to scoop the filling.  Roll each portion into a small ball, then sandwich them between two whole pretzels.  When all the balls are rolled and successfully sandwiched, stick the whole tray in the freezer for about half an hour.
Pour the chocolate chips into a microwave safe bowl and heat at 30-second intervals, stirring occasionally until completely melted.  Remove the pretzel sandwiches from the freezer and quickly dip each half-way into the melted chocolate.  Return to the tray and repeat with remaining sandwiches.  When all are dipped, return the tray to the freezer to set up completely.  Store the sandwiches in the refrigerator until serving time.
S'mores Chocolate Chip Cookies
Recipe adapted from here
Since I've begun baking as a vegan, I haven't made any recipes that require butter.  Of course I have a tub of Earth Balance in the fridge, but I usually opt Earth Balance for oil or applesauce, I'm not sure why, it just became sort of habitual.  When I came across a recipe on Angela's blog I figured why not just use Earth Balance, it's Christmas, and I'm not going to be the only one eating these cookies.  Since most people when they think of vegan baking think dull, bland, or just overall gross, I figured why not add in a flavour that they were are familiar with.  
This dough is so quick to throw together, it's a really great melding dough, and obviously you can adapt it as to how you want.  Over the break I used this recipe, well, more than a few times, just a little less than a handful,  they went really quickly.  My favourite way of using this recipe however was for a S'mores version as well a chocolate covered raisin version, between the two I'm not sure which one I preferred more, although I think at the time I was biased to both.  I was deffffffinitely more than obsessed with chocolate covered raisins, and since kicking gelatin from my diet it's been a good almost two years since I've had marshmallows - I wasn't going to allow that to go on longer however.  I drove to our local organic grocery store and bought myself $12.00 vegan marshmallows, my boyfriend definitely thought I was nuts, but it was so incredibly worth it, every single last cent.  
Two summers ago I tried many, many recipes for chocolate chip cookies, trying to find my favourite, this is it.  This is my go-to recipe when it comes to chocolate chip cookies, I love it.  Crispy edges, soft gooey centre, yup, it's my favourite type, and the fact that it's so easy to make too, bonus!
Ingredients:
  • 7 tbsp Earth Balance + 1 tbsp extra virgin olive oil (or 1/2 cup Earth Balance- see note)
  • 1/2 cup packed brown sugar
  • 1/4 cup cane sugar (or use white)
  • 1 flax egg - (1 tbsp ground flaxed mixed with 3 tbsp water)
  • 1 tsp vanilla extract
  • 1/2 tsp baking soda
  • 1/2 tsp sea salt
  • 1/2 cup whole wheat pastry flour
  • 3/4 cup spelt flour
  • 1/4 tsp cinnamon
  • 1/2 cup vegan Graham Crackers
  • 1 dark chocolate bar
  • Vegan marshmallows - chopped (depends on how many dough balls you get)
Directions: 


Preheat oven to 350 and line a baking sheet with parchment paper. In a small bowl, mix together the flax egg and set aside.

With an electric mixer or in a stand mixer, beat the Earth Balance until fluffy. Add the brown sugar and cane sugar and beat for 1-2 minutes until creamy. Beat in the flax egg.  Beat in the remaining ingredients, excluding the marshmallows and chocolate.

Shape balls of dough and then squish down.  Stuff your flattened dough with chocolate and marshmallow, roll back into a ball and make sure the two ingredients are completely covered, then place on the baking sheet.  

Bake for 10-12 minutes (or up to 14 mins on a Silpat mat). Allow to cool for 5 minutes on the baking sheet and then transfer to a cooling rack for another 10 minutes.

Yield: 12-14 large cookies.

... as well, I also made S'mores Marshmallows - all I did here was broiled the marshmallows for a few minutes until they got nice a crisp.  I allowed them to cool down, dipped them in melted chocolate than rolled them around in graham crackers.  I'm not sure what was a bigger hit - these or the cookies, they were fantastic, so simple to make and just incredible for a quick dessert!

Peanut Butter Chocolate Marble Fudge

Recipe taken from here
Now, I have never been a fan of fudge.  I have always found it to be far more sweet than necessary.  I mean, when I finish eating a teeny tiny square of fudge I feel like I've simply been eating sugar with a spoon out of a bag and need to head on over to the dentist.  Now, why would I want to eat a dessert that makes me feel like this?

Over the holidays however, I had seen a few recipes for vegan fudge, some with the standard butter and cream base (obviously using vegan substitutes), some using coconut butter, and then some using nuts.  The one with nuts intrigued me very much so, especially because of the addition of peanut butter, I knew I would certainly have to try out a recipe for vegan fudge that was primarily utilizing nuts.

This is not your traditional fudge.  It is not overly sweet, nor does it have the same texture that you get in your standard, cream, butter, and sugar fudge.  I actually really enjoyed this, and it was a heck of a lot easier to make as well since you didn't have to stand over it, nor did you have to use a candy thermometer which is always a plus in my books.  The result was extraordinary and I would certainly make this again.  The only thing you have to watch out for is that you have to keep it refrigerated, because if you keep it at room temperature for too long it almost starts to lose it form and looks as though it's melting.

Chocolate Fudge:
  • 1 cup cashews
  • 1/4 cup agave nectar or maple syrup
  • 1/4 cup cocoa powder
  • 2 tbsp coconut oil
  • 1/2 tsp vanilla
  • Pinch of salt
Peanut Butter Fudge:
  • 1/2 cup cashews
  • 1/4 cup agave nectar or maple syrup
  • 1/2 cup natural peanut butter
  • 3 tbsp coconut oil
  • 1/2 tsp vanilla
  • Pinch of salt
Directions:

For chocolate fudge - 

Process the cashews in a food processor until it turns into a dense butter (it should look sort of like play-doh but still be crumbly, no nut pieces though!) Then add cocoa and salt. Blend until combined. Add sweetener of choice, coconut oil and vanilla. Blend until thoroughly combined, it should ball up at this point. Take out and set aside on cutting board or clean countertop.

For peanut butter fudge - 

Process cashews the same way as for the chocolate fudge. Add salt, blend until combined. Add peanut butter, sweetener of choice, coconut oil and vanilla. Process until thoroughly combined.

Rip doughs into 4 large chunks so you have 8. Marble fudge by combining the 8 separate pieces together, and knead until you see it marbling. Shape into a flat rectangle a good inch thick. Chill covered in fridge overnight or at least 3 hours. 


And there you have it, I may be a few months late getting on with this post, for who knows why other than pure laziness but I got it done!  As they say better late than never, and I came through ;)